Onto Issue 7 and what seems like a simple procedure turns out to be a little more work than I thought, it's always worth double checking to make sure your fret/parts are flat and no warping has occurred, especially since we are moving towards the bow (front) of the ship. I've seen many ways of getting the slight or even severe warps out of ply, one being soaking in warm water then placing the part under a flat surface for at least 24hours. It really depends on how bad they are, as mine is not that bad I have another workaround.
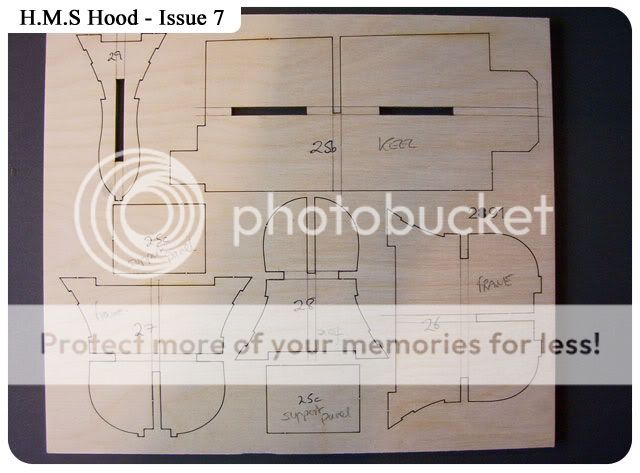
So the other problem is the parts are not marked with any numbers on the frets (see picture) to be honest it's really not gonna be that hard to pencil them in and mark up the lines. Cover all angles.
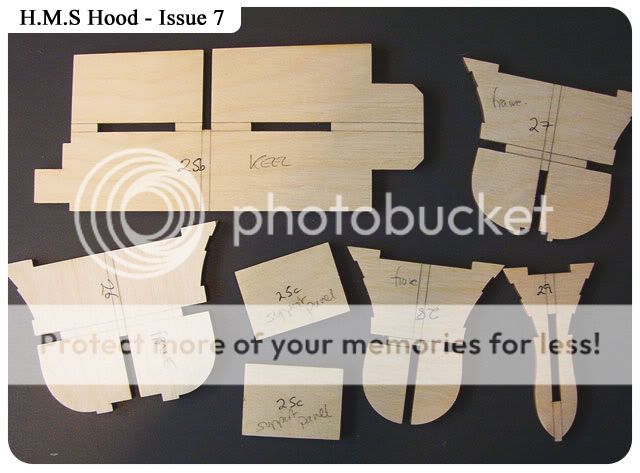
Carefully the parts are cut and sanded, checked and marked ready to be added to the hull.
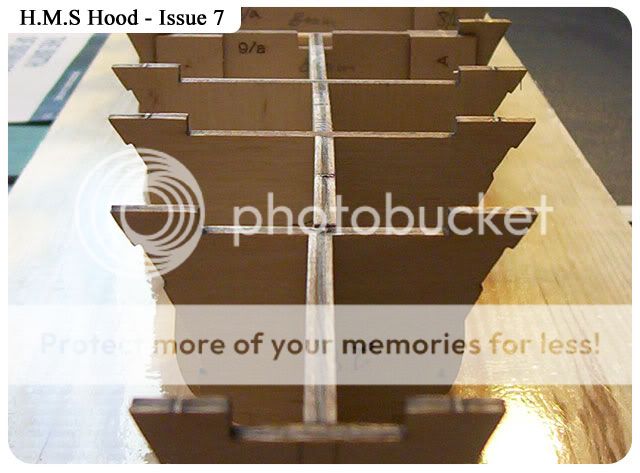
I find by dry fitting all parts I can see if there will be any problems, in this case some warping of the upright keel and a little on the frames. Dry fitting gives you an idea if any parts need extra sanding ect.
Here you can see my problems.......
I didn't follow the magazine instructions here but decided to join the 2 upright keel parts to at least give me some way of getting a straight line heading towards the bow.
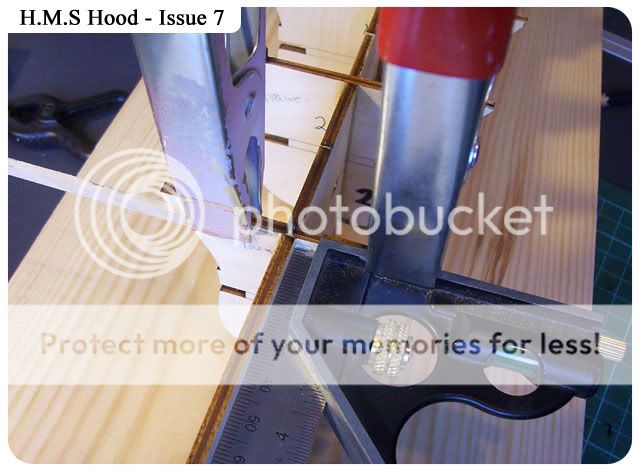
The two support panels glued and clamped on part 25a first, I laid this part in place and then glued the side supports (25c), making sure they were in the correct position, lifted them away and added the clamps.
After 25a and the supports have dried I then offered up the new part 25b, again I added the glue to the areas and laid these parts in position to make sure its was straight, then removed and added the heavy clamp.
But I'm still not happy, the amount we have added to the bow I can see this heading in all directions so I've taken a small area from the ply fret and a couple of screws and marked where the glued keel upright's lay on my build board.
With the keel parts in place to mark my position these give me a little more confidence that the bow parts will not bend out of shape.
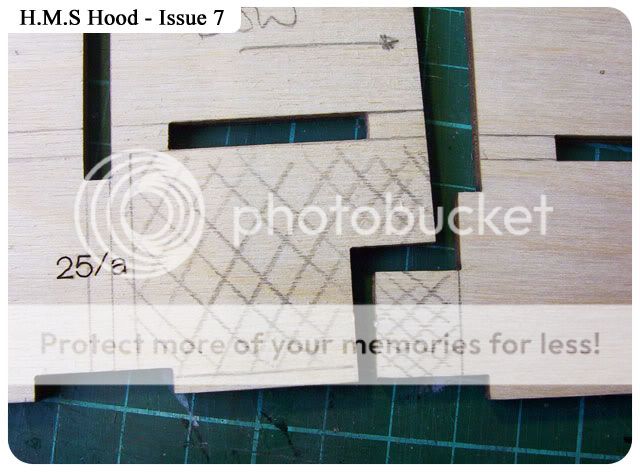
The warping on part 25b is shown in the blurry picture, and inset I've just added a couple of spare planks and some clamps to hold the correct position, more of that later......
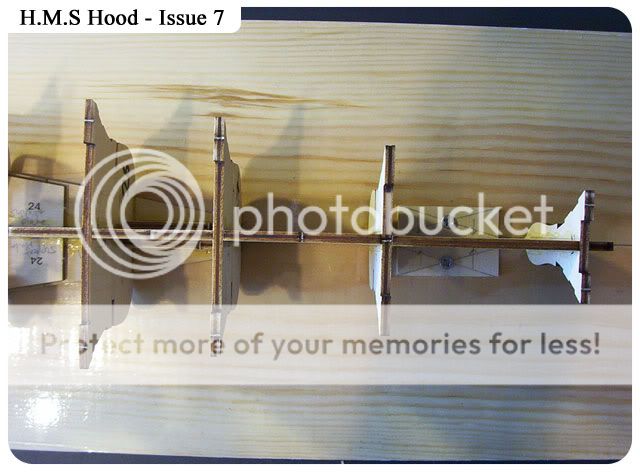
The two upright keel parts now glued to keel 24, over use of set squares and marking what needs to be glued, personally I'd rather check and double check and then only glue once.
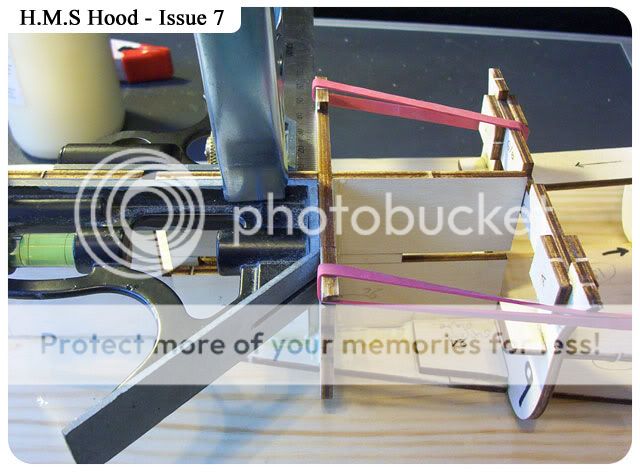
Adding the first frame 26 and again some warping, nothing too much, just look at where I've added the elastic bands, set square clamped to try and pull the frame back in shape.
I'm happy with this......nice and slow, measure and check.
Adding frame 27 here, just check all areas to make sure they are nice and straight, I don't think it's going to matter a massive amount if you are a mm or so out on these frames as this will be strengthened and double planked but I like to spend the time now getting it perfect.
Frame 28 added, notice I've added a scrape piece of wood on the left side of the frame to try and push the upright keel part inwards, to avoid to much of the upright keel from taking a different route.
Almost perfect, but not quite, I'm happy thought:)
So really don't think each issue is going to be easy, beware of warped parts/frets, just lay them on your kitchen surface and have a quick look. I'm not saying this issue was hard, more of a pain having to adjust the uprights and frames to get them 100% square...or at least as square as your able to.
Issue 8 on Wednesday, looks to me like some bow parts again????? strengtheners for what we have just done???


No comments:
Post a Comment