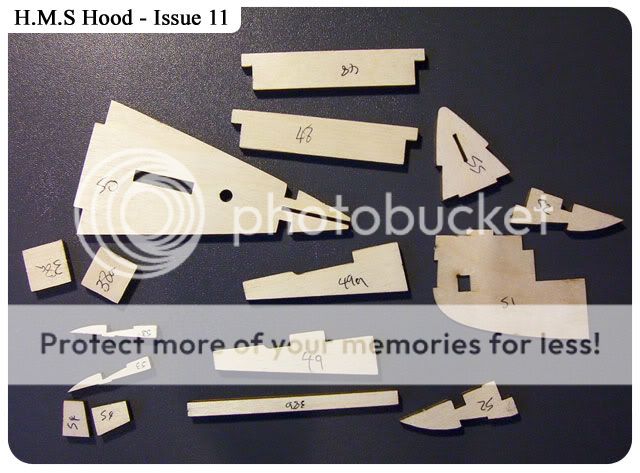
First off this issue is a little late landing, I tend to get my copy of the magazine of Wednesday but not start until Sunday, normally this would happen but other things have taken over, anyway back to our model. I think we have to assume the ply fret's will NOT be marked up and we have to copy what is in the magazine, make this your first priority, as we have a few small parts take your time cutting them out.
Thanks for all those comments so far, feel free to add anything you feel, if I've made a mistake please let me know. Enjoy!
Same procedure....copy numbers from magazine, cut and sand, take time to prepare your parts
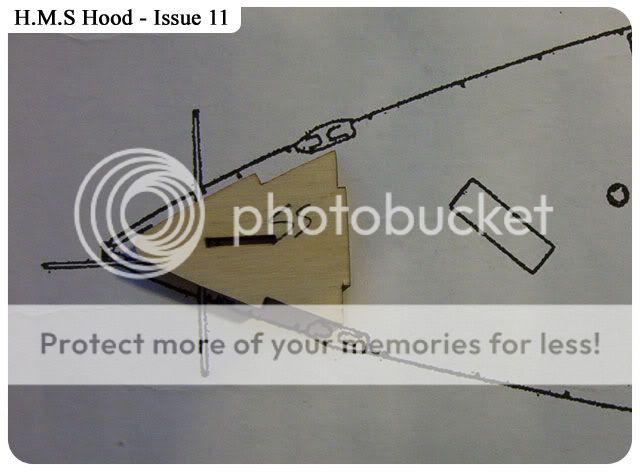
This thin part (51 - Keel) was a little unsure about this being a lot thinner than the other parts supplied, and considering where it's placed I wanted to see how accurate the plans where, as you can see laid on top of the 1.200 scale plans...pretty close.
Again this part (55 - Deck Piece) laid over top, it looks a little smaller but you have to remember we are doing double planking so this will be about right.
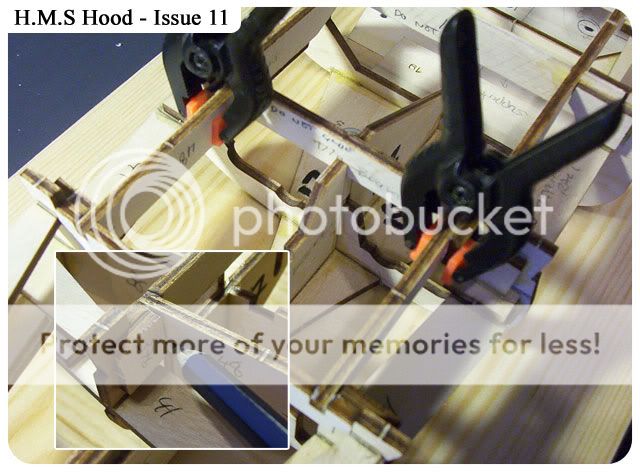
No problems adding parts 48 on both stern and starboard side, but do watch you don't get glue where it lay next to part 37b (see smaller picture, pencil pointing at area) as these new parts have to come out when the deck has been completed..clamps just to give a stronger bond.
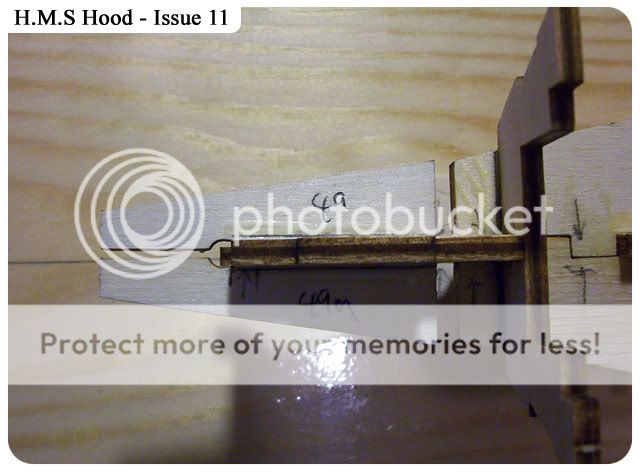
Parts 49 and 49a are shown here, where the red circle is don't join them, this gap is for the thinner part 51 to slip into. I found it best to dry fit first.
Part 50 added, I dry fitted this to check and make sure it was flat and level, a little sanding on the frames and offer up thin part 51 to make sure it's square.
As you can see here the red circle shows what I used as a position guide for both side to make sure this part was level, the opposite side will (should be the same)
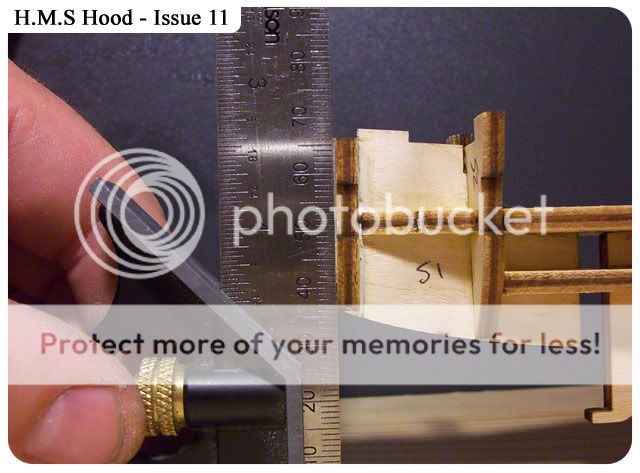
Adding the thinner part 51, a few clamps just to take a bite of part 51. Again check this part with a set square to make sure it at 90 degrees.
As you can see on mine it's not, OK so it about 1mm out, the double planking and other parts to be added will sort this out.
I think this speaks for itself, a set square on the base board marking lines for parts 53, as its so small and only the smallest of hole for it to sit in I felt it needed just a little help to make sure it was straight.
The result!
Support pieces added with the aid of a clamp just to get some extra bite, take your time with parts like this, its easy to glue them on and have over with in 10mins but think about what goes where and why, dry fit, check and re check, understand what this part will do and you will begin to think more on the outcome of rushing....advice over:)
The final part of the stern added (55 - Deck piece), notice how this slants down a little, this hopefully will give some sheer at the stern as it's done at the bow.
I've not taken a picture of adding the beam and the tabs as shown in the magazine as it's really too simple to worry about, just make sure you DON'T glue the beam 38b.
Looking from the stern towards the bow, I'm loving this model.


No comments:
Post a Comment