Part 1 -
Second planking starts, I will not be following the magazine instructions/order, as I prefer to plank my way..be it correct or not, its my preferred approach. Nothing much to talk about here apart from trying to get as good as possible 2nd planking as possible, trying to correct any areas you think may show with either dips or bumps, sand the first planking well will set you up perfectly for the second and last layer on our ship. Once again a little time taken over the 'thinner' planks supplied by bevelling them to butt up against each other were needed, this will mean you sanding will be minimal.
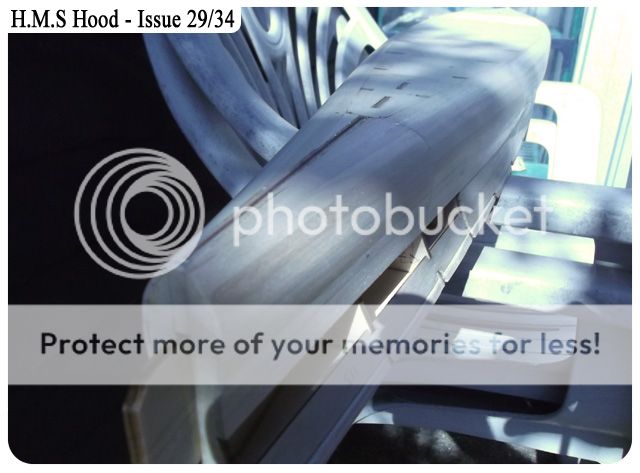
Some outdoor sanding, the rain stopped and the wind was in a good directions..perfect day for sanding the hull!
Always look at the hull from different direction with the light coming from various directions, this shows any imperfections better.
I laid the hull against the drawing to see how the ply stern area compared, you can also see the port holes are a little out here..
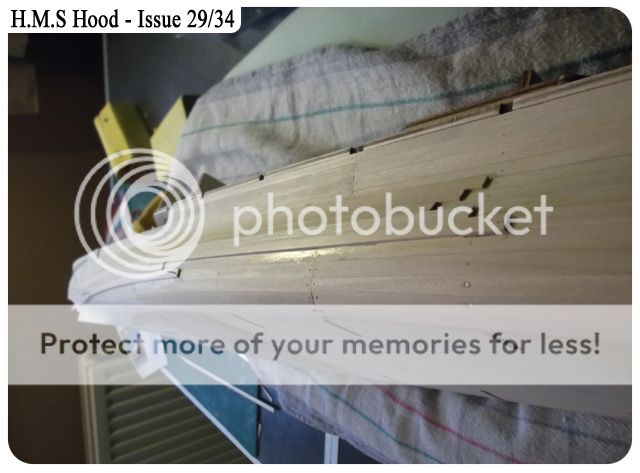
With some degree of trepidation I started the second and what will be a final layer of planking, I was first mulling over what to do to hold the planks down while the glue dries..as I'm using Aliphatic wood glue this tends to have a high tack if spread well and just hold off a few seconds, then apply the plank, maybe as in this case (picture) a single tack with the elastic band doing the business the other end. The futher along the hull the plank laid nice and flat with no need for tack (nails).
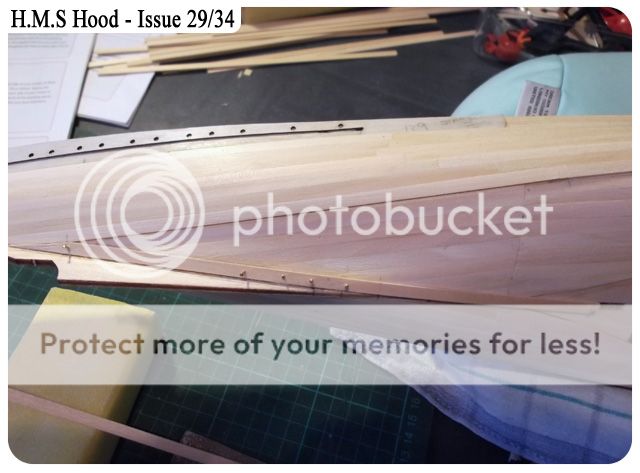
As mentioned before about bevelling your planks, this picture shows you what I mean, the main picture is one of the second layer planking laid in place, the gap shows up...inset picture show a small amount of sanding the edge of the plank (bevelling) and again laid in place...your choice...less sanding!
As you can see I'm only working on one side first but still stepping the planks but not as shown in the magazine....my favoured choice no other reason.
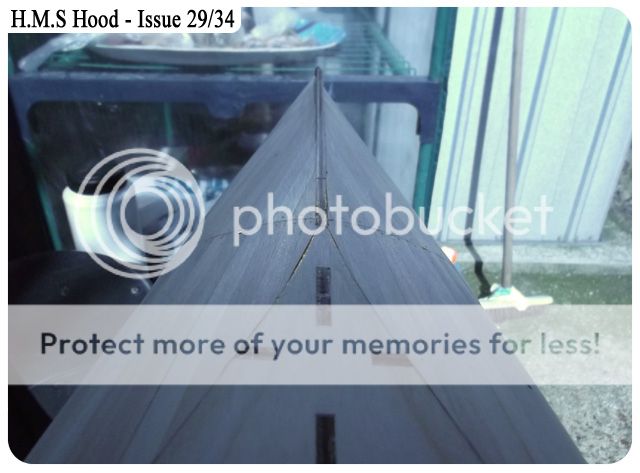
As you can see here Ive decided to add and single plank along the stern ply area where the rudder and screws will be, I wanted a nice clean shape here, so by adding that single piece all other planks butt up against it, giving me a uniform shape to work with.
I spread the Aliphatic glue over the area to be planked..as opposed to glueing the plank, let this dry a little before offering up the plank, once the plank hits this area is really does hold firm, a damp cloth wipes away any excess glue.
The start of Issue 34 has more planks but this time starts the upper section of the hull but not planking right up to the decks, hopefully Issue 35 finished this off. Do remember not to over sand this area and we want that small lip.
Well that is it for now, I'll be working more on the second planking over the weekend and during the week, I'll post up some progress shots in a new 'Part 2' post.
Aliphatic Rapid Glue
Outperforms traditional white glues with it's super fast grab time and superior sanding qualities. It will bond most porous materials such as balsa, plywood, spruce, obechi etc. and it is water and shock resistant. Useful for joining aircraft cowling blocks, wing skins, fuselage or hull planking. In fact, it is useful for any joints where the glue line needs to be carved or sanded afterwards. The glue joint will not show - unlike normal sanded PVA glue joints.


Hi Colin,
ReplyDeleteIt seems I was a bit ahead of myself with the adhesive question :) but your latest post explains It all, sound advise and I shall heed It !
You mentioned you have built the Victory, have you any pics I could see ?
Kim.
I have started (some time ago now) the DeAgostini Victory but have since stalled, when I post the next instalment I'll bung up a shot of where I am with the Victory.
ReplyDeleteHi Collin
ReplyDeleteI have been sanding the plank edges to get the bevel for the joints. I have also found the Amati bending tool very useful for bending the planks to the right profile. This tool is quite capable of producing any compound curves needed for the hull, with care and a little practice on some scrap bits of wood.
Modelmaker 21
Thanks but soaking the plank in hot water for 20mins or so and using the wife's hair curlers to heat the planks to the curves works just as well..and I don't spend money on those tools.
ReplyDeleteHi Colin,
ReplyDeleteI have been reading some of the post's on your site and other blogs, I think I might have bitten of more than I can chew, in short I wonder If I'm out of my depth.
As a kid I made ton's airfix and balsa gliders and powered aircraft but that was more years ago than I care to mention :).
Oh well as Magnus used to say I've started so I'll finish !
Kim.
Hi Colin,
ReplyDeleteDo know where I can get a decent mitre block ?
Kim.
Hi Kim, the thing with these partworks is you are only given small parts to do each week, for some it's frustrating, for others it can be the best way to work on a very large and long model like the Hood, just enjoy what parts your given each week and not worry about the bigger picture, you'll soon have a wonderful model to be proud of. Regarding the Mitre block, I started using a wooden block but found very soon this was not going to work, I now use a metal block, it has a small lip on the base to hold it in place against you table or workbench and after many cuts with your razor saw you wont find it cutting into the grooves as it would do on a wooden one..that's my take on them anyway. And here is where I bought mine - http://www.cornwallmodelboats.co.uk/acatalog/zona-sa-37-245.html
ReplyDeleteHope that helps.
Colin
Hi Colin, Noteing your first comment ''Some outdoor sanding, the rain stopped and the wind was in a good directions..perfect day for sanding the hull!'' Did you know that the HOODS moto on her badge says VENTIS SECUNDIS (MEANING) WITH FAVORABLE WINDS...
ReplyDeleteAgain,
ReplyDeleteMany thanks for the excellent pictures and ideas
I am at issue 29 and am ready to start the second layer of planking but am holding off until I get issues 30 to 33 as I want to fit the plating over the officers cabins on the port side first. I can then do opposite pairs of planks on the aft end
Steve W
Hi Colin,
ReplyDeleteMany thanks for your reply and encouragement.
Kim
Hi Steveo, I thought I recognised your name from the partwork forums, thanks for that info, I didn't know that:)
ReplyDeleteSteve W, sounds like a plan mate, but just beware of jumping too far ahead with these partworks, you never know what's around the corner, but if your comfortable in what your doing then go for it:)..and Kim...no problem.
thanks all for you interest, I'm blown away with the amount if interest in this blog, there has always been interest in the Hood but a personal blog with so many hits and interest is to say the least..encouraging.
thanks
Colin
Hi Colin,
ReplyDeleteTnaks for the reply - the interest is , I think, that we all want to produce a superb replica of one of the best looking warships ever built . and we need a bit of help
Ta
Steve W
Hi Colin,
ReplyDeleteStarted the second layer of planking very much along your lines - after a few goes at getting the planks to stick round her cruiser stern I have used a clothes peg with a small piece of fairly coarse sandpaper glues to each face of the peg - it has stopped the little suckers sliding off.
I am wondering how the bow section is going to be formed and attached - wonder when we get it ?
Steve